Resident Evil 3 - A character reference from the game

General / 25 September 2022

CONTENT:

0:00 - What will be in this video?

0:40 - Jill, Carlos and Nemesis

1:20 - Jill and Nemesis

2:02 - Jill and Carlos 1

2:30 - Jill and Carlos 2

3:20 - Jill(Default)

5:42 - Jill(S.T.A.R.S. Gear)

6:56 - Jill(Infected)

7:31 - Carlos(Default)

8:49 - Nicholai Ginovaef

9:40 - Mikhail Victor

10:42 - Brad Vickers

11:47 - Tyrell Patrick

12:35 - Murphy Seeker

13:08 - Dario Rosso

14:19 - Nathaniel Bard

15:29 - Marvin Branagh

16:33 - Robert Kendo

17:37 - Male Zombie

25:52 - Female Zombie

29:48 - Zombie Dog

30:20 - Ne-a Parasite

31:21 - Drain Deimos

32:10 - Hunter B

32:59 - Hunter Y

34:00 - Licker

34:56 - Pale Head

35:54 - Stage 1 Nemesis

37:47 - Stage 2 Nemesis

39:04 - Stage 3 Nemesis

39:41 - Charlie Doll

---

Enjoy watching! 

Sincerely, Andrew Krivulya Charly.

Report

Ornatrix/Maya grooming for character "Commander" from Samir Mir. Part 4

Tutorial / 21 September 2022


You can buy 12 different voice-overs here

This is the fourth episode about creating a hairstyle in Ornatrix Maya for the character "Commander", which was done by Samir Mir. 

In this video:

➡️ Showing the new HiddenGuideBehavior tool that was added to HairFromGuides

➡️ Showing the new "Hide Non-Selected" button in Edit Guides.

➡️ Continuing to work with the guides and improve the hair.

---

CONTENTS:

0:00 - What's coming up in this episode?

0:20 - Talking about the new references I found for this hairstyle

0:27 - Talking about the promise I made in the previous episode.

0:43 - Starting to keep that promise.

0:47 - Creating a plane for our task.

1:00 - Adding Ornatrix Furball Preset

1:11 - Adding SurfaceComb to adjust the direction of the hair

1:28 - Turn off hair selection for optimization, and turn on Camera Facing Normals for nicer display in viewport.

1:38 - Turn on 100% hair display in HairFromGuides

1:42 - Add Clump to break hair into bunches. 

1:50 - Beginning to talk about the new tools I promised to show you. Previously, to isolate the desired part of the hair, we used the Isolation Tab and the Hide button.

2:47 - Showing the new Hide Non-Selected tool in Edit Guides.

2:54 - The new Hidden Guide Behavior tool in HairFromGuides.

4:13 - Continuing to work with the guides for Commander hairstyle.

20:26 - Adding groups for guides to make it easier to distinguish them.

---   

Enjoy watching! 

Sincerely, Andrew Krivulya Charly.


Report

Ornatrix/Maya grooming for character "Commander" from Samir Mir. Part 2

Tutorial / 09 September 2022


You can buy 12 different voice-overs here

This is the second episode of the series, in which I continue to create a hairstyle for the "Commander" work by Samir Mir - using Ornatrix Maya.

In this video:

➡️ Showing working with guides in Edit Guides - using the "Comb" and "Grow Shrink" tools

➡️ I also demonstrate the "Isolation" tool in "HairFromGuides", which allows you to isolate a selected part of the hairstyle - to simplify the "viewport" and make it easier to work with.

---

CONTENTS:

0:00 - What are we going to talk about in this video?

0:24 - Continuing to work with hair from where I stopped in the previous episode.

1:14 - Working with the guides in Edit Guides

5:04 - Temporal part and using "Comb", "GrowShrink" brushes.

7:25 - Working with the "Isolation Tool" in "HairFromGuides".

---   

Enjoy watching! 

Sincerely, Andrew Krivulya Charly.

Report

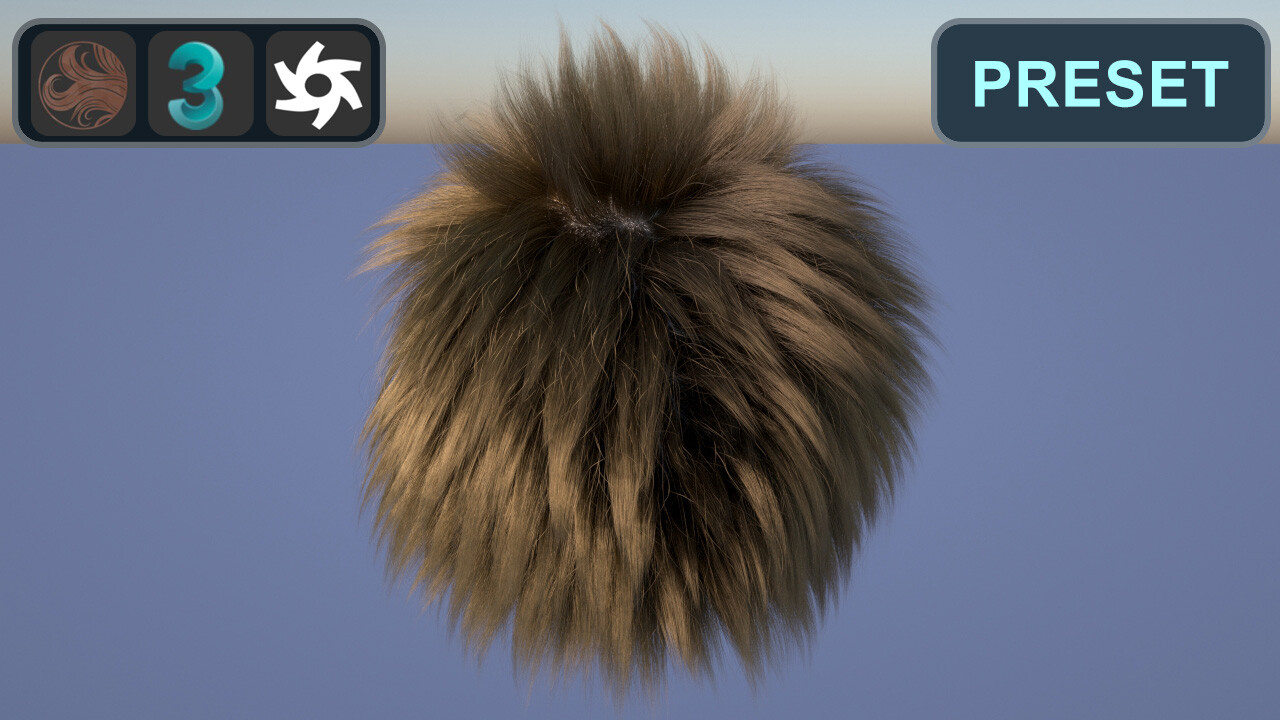
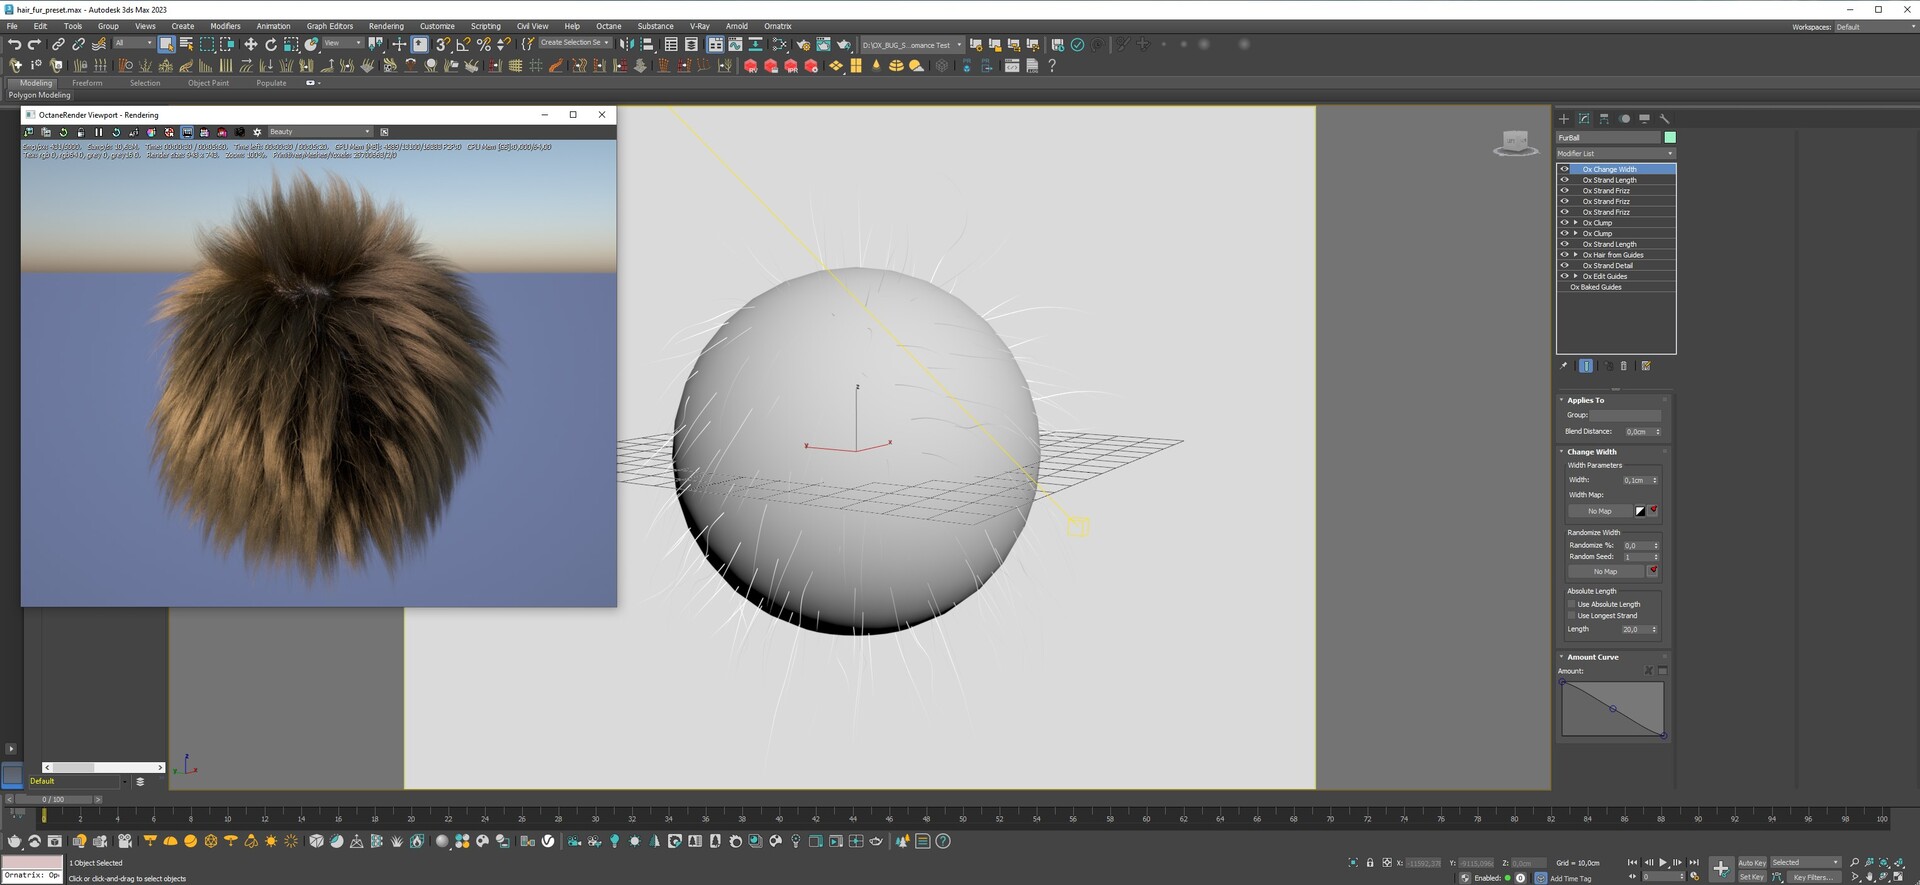
Octane fur/hair preset - 3ds Max 2021 - Ornatrix 7.3.9 - Octane 2021.1.6 - 12.24

General / 31 August 2022


Hi all!

Today I was asked to share preset, which would be a good start for learning Ornatrix =)

You can buy this asset here

Of course, the settings for each object will be different, but still =) If you want thinner wool or hair, you'll need more hair, but keep in mind that this thing eats a lot of GPU - CPU memory. =)

Enjoy!

Report

3D-Coat 2022: Power-Smooth tool for hair masks.

Tutorial / 31 August 2022


You can buy other voice dub(12 languages) and watch this video without ads and etc here

In this video - I show a new tool in 3D-Coat, which is named Power-Smooth. It allows you to make a smooth transition from one color to another, which is very useful when drawing masks for fur or hair masks for Ornatrix.

The tool appeared recently and I am very grateful to the developers for adding it at my request. Especially for this, I created a branch in the forum

Previously, in order to get such a blur, you had to reduce the resolution of the canvas. For example, if your resolution was 2048*2048, you had to reduce it to 512*512 or even 256*256. In that case, holding down the SHIFT key would work. But this approach caused us to lose fine details which were not cached when we returned to the original resolution. This was very inconvenient. 

Now, just select the Power-Smooth tool and blur the borders where needed.

---

CONTENTS:

0:00 - Choosing subtitles

0:05 - Where can you buy dubbing in other languages?

0:10 - What will be in this video?

0:40 - Greetings and what this channel is about

0:50 - How long have you been doing 3D?

1:00 - About supporting the channel on Paypal and other platforms.

1:15 - What's this going to do for you?

1:30 - About Youtube-community.

1:40 - About Instagram and my work.

1:44 - Starting the tutorial.

1:50 - What do you need to do to use the tool?

2:16 - Loading a basic sphere to show how the tool works - using it as an example.

2:28 - Fill the sphere - with white.

3:18 - Drawing a few strokes in black.

3:56 - Showing the previous method for a smooth transition of one color to another.

4:26 - Talking about the downside of this method.

5:11 - Demonstrating the Power-Smooth tool

5:30 - Talk about its settings.

---

CHANNEL SUPPORT:

If you want to support this channel, then throw your donations here:

➡️Paypal

---       

USEFUL LINKS:

➡️The main channel

➡️Instagram 

➡️Twitter

➡️Miscellaneous interviews and magazines with me

---

WHO AM I?

Hi, my name is Andrew Krivulya Charly and I am a 3d-artist who began my journey as a 3d-groom artist in 2016

New works can be seen here

Before that from 2009 - 2016 - I did environmental art, interiors and many other things. You can see old works here

---

Enjoy watching! 

Sincerely, Andrew Krivulya Charly.

---

MUSIC:

Production  Music  courtesy  of  Epidemic  Sound" www.epidemicsound.com

Report

Resident evil 2: Character reference from the game - #gamereferences

General / 28 August 2022


In this video I show a reference of all the characters from Resident Evil 2, which become available after the full walkthrough.

As I said in the recent news, I'm merging all of my channels into the main one you're sitting on right now. And that means that new episodes of GameReferences will be coming out here.

For those who are looking at such a genre for the first time, I'll explain right away.  For me, a reference from a game is an atmosphere, a spot of color, and so on. Any bit of it can inspire creativity. Be warned right away - this is not your typical quick playthrough. 

A series of these videos is a collection of different references from games - for 2d and 3d artists. That is, yes, here I am playing games - but slowly walking around their world to consider different details, where the game allows it. Where it makes sense to turn on the photo mode - I turn it on and consider different moments. 

P.S. The hair in the game was done with Ornatrix =)

Report

Redshift/Maya: How do I render 1% hair in IPR?

Tutorial / 25 August 2022


In this video, I show you how to render 100% hair in Redshift IPR and Maya when you have 1% or less in viewport. I also talk about how to properly export Redshift Proxy and import it back.

You can buy other voiceovers(12 languages) here

Also, the difference between the videos that I uploaded here is that I cut out of them all the additional information that I upload to the channel (it is not relevant to the lesson). That is, you just watch the lesson and do not get distracted by anything. 

--- 

CONTENT:

0:00 - Information about choosing subtitles

0:05 - Where you can buy voiceovers in the other 12 languages.

0:10 - What's coming up in this video

0:22 - Welcome

0:26 - What is this channel about?

0:33 - How long have you been doing 3D and why did you choose this field?

0:40 - About VK and Telegram

0:52 - About donations and helping the channel.

1:04 - What will you get out of it?

1:17 - About Youtube-Community.

1:26 - About Instagram

1:31 - Going into FurBall shape and enabling the Render-Mode Evaluation option. 

1:50 - Checking what you get in Redshift IPR.

2:03 - How else can we use this option?

2:07 - Exporting hair in Redshift Proxy

2:16 - Importing the resulting object and checking in Redshift IPR.

2:32 - You may notice that the IPR update is faster than with the Ornatrix object and all the modifiers. This is because Redshift doesn't check them for updates - a feature of the render workflow. So if you want to speed up the workflow in IPR - export RS Proxy.

2:48 - Check how Redshift RT works. By the way the hair looks a little worse in this mode, but the render itself happens in Realtime, almost like in Unreal Engine.

---

Enjoy watching! 

Sincerely, 

Andrew Krivulya Charly.


Report

Ornatrix/Maya grooming for character "Commander" from Samir Mir. Part 3

Tutorial / 19 August 2022


In this episode - I continue to work with the guides in Ornatrix for Maya to get the right shape of hair. I also apply - the first basic clump to get bunches of hair and give more realism. And of course - adding basic Frizz. But mostly - all the work comes down to editing the guides.

---

You can buy voiceovers in different languages here

--- 

CONTENTS:

0:00 - Turning on subtitles

0:05 - Where can I see dubbing in other languages?

0:10 - What will be in this episode?

0:42 - Editing the guides

3:46 - Creating a new Clump.

7:49 - Adding SubClump.

8:15 - Adding Frizz.

9:00 - Back to editing guides and form again

13:15 - Editing groups for Clump.

---

CHANNEL SUPPORT:

If you want to support this channel, then throw your donations here:

➡️Paypal

---

➡️PLAYLIST WITH ALL THE EPISODES:

---       

USEFUL LINKS:


➡️The main channel

➡️Instagram

➡️Twitter

➡️Miscellaneous interviews and magazines with me

---

WHO AM I?

Hi, my name is Andrew Krivulya Charly and I am a 3d-artist who began my journey as a 3d-groom artist in 2016

New works can be seen here

Before that from 2009 - 2016 - I did environmental art, interiors and many other things. You can see old works here

---

Enjoy watching! 

Sincerely, Andrew Krivulya Charly.

---

Report

On the way to CG Grooming. My Story. Episode 6 - 2017 - MBC Project(IXOR VFX)

Article / 06 August 2022

All Renders here:

➡️ARTSTATION BEAR
➡️ARTSTATION EAGLE
➡️ARTSTATION SHARK

---

➡️УКРАЇНСЬКА МОВА

➡️РУССКИЙ ЯЗЫК

---

As I wrote in a previous post - before this order - I did not really do a fur... was a hedgehog... Forester I have done later, when I felt confident in my abilities ... Lamb too ... So in the portfolio was - only 2 hairstyles and a bunch of old works, not related to grooming. That is unlikely - can inspire the customer to order such a complex project from me =) Although in fact - there is nothing complicated, because it was more work with hair than with fur (but that I now realize it, but then - to me it seemed unreal).

 But, IXOR VFX(Greece) came and made an order. At that time I remember Andronikos came the first time and said that he needed 3 characters - an unusual style like ghosts, but with hair and fur. I immediately replied, "I'm sorry, but I have no experience in this, I won't be able to help...". Since I've always turned down clients who wanted to do something I've never done. Because I think that you should take only those orders in which you are a pro, and I constantly say this to those who come to me in the group with burning eyes and one place shouting, "Help, help! I do not know what to do, deadlines are burning and need something to solve, and little experience ... Never, you hear? Never take on an order if you don't have any experience at all... And if you do, then negotiate with the client for extra time, because you need to learn it and do it, if the client is too lazy to look for and pay a specialist with experience. 

Yes, I had no experience in creating such characters, but I already had at least some experience in tools and creating hair, working with guides and so on... Please do not lie to customers to make money, that you can... In Grooming, what I often observe with beginners - they do not manage to learn something overnight... This way they let clients down, get upset themselves and spoil their reputation. And then such clients come to me or my colleagues and ask to correct mistakes of such irresponsible freelancers. I'm serious! Maybe in other fields it works and you can quickly learn something there overnight ... But in Grooming it's rare. It's better to take it with experience. At least knowing all the buttons and how each modifier behaves ... Because it may be that in the chat no one will answer and then what? How will you continue to lie ... Of course, it's up to you ... but for me - better not to take such orders ... But never mind =) Back to my story.

Anyway, when I said I wouldn't take this order - Andronikos didn't accept my refusal =) He texted me, "Hmm, I know you can do it! Don't refuse." So I thought, why not... since the man saw my talent and has so much faith in me. In the end - we released this great video and I did 3 characters + helped with the fur - for the other two.

Yes it was difficult because of the lack of experience in working with such characters, there were some confusing moments - but we made it, because we worked as a team and another big plus was that I could always ask questions to Marcel (creator of Ornatrix) and he helped to understand many things =) But then again - I rarely bothered him and more of course searched for the answer myself. Basically - a lot can be found in the documentation, but there were points that were not very clear. There were no tutorials on Ornatrix at all back then - on Youtube and I was essentially the first one to start recording them after Ephere =)

It's easier now, because Ephere already recorded a lot of tutorials, on my channel - most of them, Artem is recording... so, you don't need to complain about the lack of information now =) Please, don't be lazy and watch all the videos. Learn to work with the material and learn discipline. Take your time. Yes, I understand that you want to create something at once. But you won't get anything good, if you don't know the tools you need and don't practice on simple things.

This is my first project, in which I finally dealt only with hair and fur, and not all aspects. That is, the 3D modeling and everything else was taken care of by the IXOR team.

As you have already understood - first I did the bear. The most difficult thing here for me was to create the right face and paws... And this hair had to flow smoothly into the hair, which we see in the frame. At that time I didn't know about the SurfaceComb modifier, which helps to set the direction of the hair.


And had to comb everything - by hand =) It's much harder than with this modifier. But nevertheless - I made it.

Even then I did not know - that the more fur - the better the results and interpolation. But back then the computer didn't pull much wool either, so that stopped me from making more. It was in the hedgehog that I could also make it more and it would be more fluffy. It's the same way here =) If I were making this bear now - I would reconsider many aspects of creation.

But anyway, in spite of this ignorance - the result pleased the customer and we went on.

By the way, there was no DrawStrandsTool at the time and all these flying bundles of hair I created with Zbrush =)


That is, I created a haircard, and then make all the hair on it - using the tool HairFromMeshStrips.

In the Making of, which I will upload at the very end - you can see this moment =)

As a final product of the team's work, this was the result.


Next, when I had finished the bear, I began to create the eagle.

This is another character for the IXOR VFX project. It also took about 5-10 days. I don't remember exactly. There weren't many adjustments, because it's much simpler than the bear =) Basically - there are no feathers, but some kind of "flying" hair. So there was no difficulty in making it at all. Of the whole series - this is my favorite =) I even think if they made it now and launched NFT, this product would sell out fast =)

I worked hard on the guides around the wings, because at the time I did not understand why there are strange "gaps" ... And it was because I did not create enough guides and did not regulate their direction. The main thing is to find a balance and constantly discuss their number with the animator =) It was such a problem at the time though, since there were no Adopt External Guides. 

It is now possible to use as many guides as you need for your task, and if there are many for the animator - you can just create a separate object with a smaller number and connect it with this modifier. But at that time - it was not there. So I had to work hard and find a balance =)

We ended up with this little cinematic.

Just like last time - everything else, except the hair - was done by the IXOR VFX team.

Next - I was given a shark. I remember being thrilled with the idea. I love unusual characters. I mean, really, where have you seen a hairy shark? =) I've seen hairy dinosaurs recently, but a shark...This is the last character I groomed for this project. Yes, there are hairy sharks =) I absolutely loved the idea and did this project with great pleasure. In fact - I do every project this way because I really enjoy the whole creative process. After all, I don't take on uninteresting projects.

When I did Shark, I also had to struggle with the number of guides, because, again, there were no Adopt External Guides back then. So you had to save guides, not create thousands of them for your tasks. After all, when you want to repeat every line of a concept, you have to do Clump by guides, and that leads to a lot of them. Anyway, as I said - then you needed a balance and we were looking for it together with the animator who was doing the simulation of these hairs.

So that's the result.

A little more Making of: 

I don't even know what else to tell you - as everything I can - told you above.

So if anything is interesting, just ask questions in the comments =)

Client: MBC Sports

Production: Third Eye FX

CGI Director: Andronikos B.

Thank you and have a good day

Sincerely,

Andrew

-—Did you like the post? Don't forget to like it, subscribe and share your impressions of this work - in the comments.-—
Report

Ornatrix Features #38 - Demonstration of Gamedev Workflow in Maya

Tutorial / 22 July 2022


In this episode - I'm just showing the convenience of the HairCards workflow in Ornatrix Maya, when you can edit each of the HairCards at any time (combing, increasing or decreasing the length, trimming, etc.)

Yes, this Workflow is a bit worse than Ornatrix 3ds Max, since it doesn't support Branching, which I've already mentioned in my videos. But still - it's much more convenient than creating HairCards completely by hand without Ornatrix. 

This is just a small part of what you can do.

--- 

CONTENTS:

0:00 - Selecting the first layer of hair

0:06 - Demonstrating the HairCards combing option

0:30 - Decreasing or increasing the length 

0:33 - Demonstrating combing again

---

CHANNEL SUPPORT:

If you want to support this channel, then throw your donations here:

➡️Paypal

➡️DonationAlert

---

WHO AM I?

Hi, my name is Andrew Krivulya Charly and I am a 3d-artist who began my journey as a 3d-groom artist in 2016

New works can be seen here

Before that from 2009 - 2016 - I did environmental art, interiors and many other things. You can see old works here

---

Enjoy watching! 

Sincerely, Andrew Krivulya Charly.

---

Report